Oh hey. That month went by fast.
Quickly, must assuage posting guilt! Have a photo apropos of nothing!
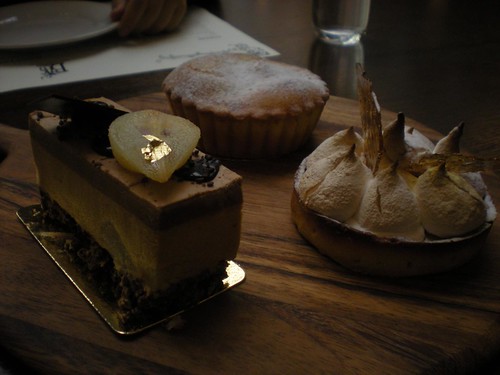
This was from a leisurely lunch at Bacco QVB with Nicole and Serena. The pear and caramel thing with the gold foil is what I ate, and I am pleased to report it was delicious. The other two items are a lemon meringue tart and a ricotta tart, also reportedly delicious.
I haven't been baking at all lately, it's just never the right time and with the weather warming up I'm not that interested in baked goods (lol I lie, I'm still perfectly willing to buy them...).
So here is a Middle Eastern-inspired salad I made for a recent impromptu dinner. It goes best with a bit of couscous I think, as it was a bit sharp on its own. Tasty though.
Eggplant Salad
3 eggplants, cut into 3cm cubes
Salt and pepper
Olive oil
1/2 red onion, thinly sliced
50g pine nuts, toasted
1 tomato, finely chopped
1/2 clove garlic, sliced
1/2 cup mint leaves, chopped
1 cup coriander
1/2 tsp cumin
Dressing:
Juice of 1/2 lemon
1 tbsp red wine vinegar, or sherry
1 tbsp extra virgin olive oil
Sprinkle the sliced eggplant with salt and place in colander for 30 minutes. Then rinse and pat dry with kitchen paper.
Heat a large pan with oil and shallow fry the egg plant until golden over over. Drain on kitchen paper.
Combine the cooled eggplant with remaining ingredient and season.
Comine the dressing ingredients and add to salad.
By Brigitte Hafner, in Good Living Summer
Monday, December 6, 2010
Wednesday, November 3, 2010
Siff Week #4, and quinoa with apricots and butternut pumpkin
I really lost SIFF steam towards the end of October, with only a couple of events in the last two weeks. I have no idea how those food blog kids keep up the pace.
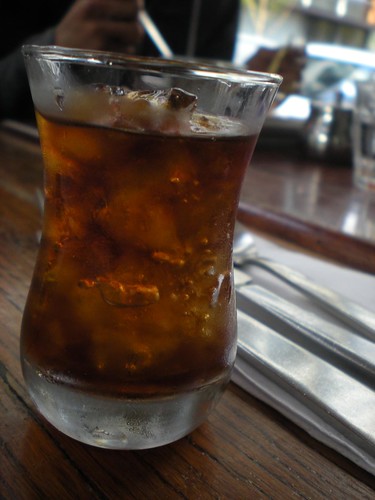
So for our SIFF finale we returned to Single Origin for the fourth and last in their series of Origin Breakfasts. This time it was the Dominican Republic's turn for a two-course breakfast served with coffee prepared three ways: siphon, cold drip and espresso.
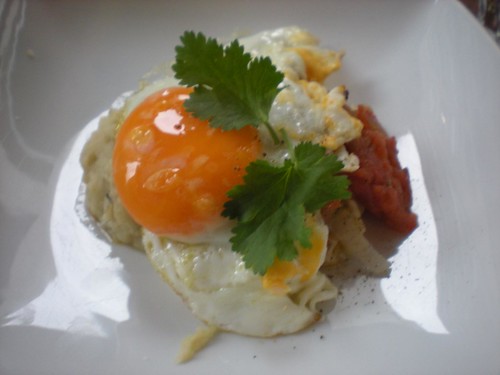
For savouries, we had mangu (plantain) with tomato and egg. Plantain was a new and pleasant surprise to us all - very tasty and filling.
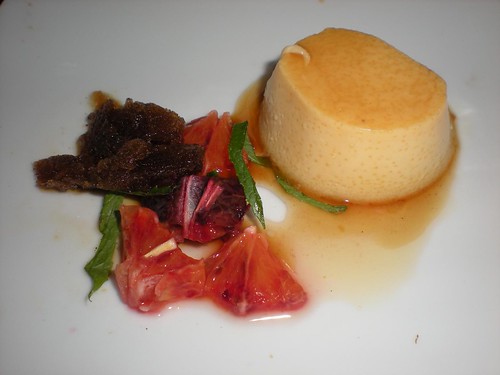
Followed up by a delicious honey flan with coffee granita and blood orange. (Y'know, I always thought flans came inside pastries. Wrong!)
The Dominican coffee blend was heavier and more bitter than the Yemenese and Nicaraguan blends we'd tried before, but I will never turn my nose up at a good coffee well made. In other words, :9
I really enjoyed all three of the Origin breakfasts, despite having to rise at an ungodly hour. By the end of the month, we pretty much felt like Single Origin regulars (though the staff failed to recognise us every single time, ha!).
And then it was national pony-racing day - I mean, Melbourne Cup. As usual everyone in our office had to bring in a plate of food or similar contribution. Just as usual, I chose food. In the end we assembled a massive spread, with lots of tasty dips, antipasto, roast chicken, several salads, and a ridiculously awesome berry-topped pavlova. And did I mention the champagne? Really, I enjoy the food and drink of Melbourne Cup day more than the race itself...
This vegetarian and gluten-free recipe is adapted from the Ottolenghi cookbook. The original uses couscous, for which I've subbed in quinoa, which is gluten-free. The quantities shown below are meant to serve 4; I doubled all of the ingredients and wound up with almost a kilo of food! Most of it was eaten, thank goodness, but there is still a bit of leftover quinoa in my fridge.
Quinoa with dried apricots and butternut pumpkin
1 large onion, thinly sliced
6 tbsp olive oil
50g dried apricots
450g butternut pumpkin, peeled, seeded and cut into 1-2cm dice
250g quinoa (or couscous, if you prefer)
400ml gluten-free vegetable stock (or chicken)
pinch of saffron strands
3 tbsp roughly chopped tarragon
3 tbsp roughly chopped mint (or more, to taste)
3 tbsp roughly chopped flat leaf parsley
1 1/2 tsp ground cinnamon
grated zest of 1 lemon
sea salt and black pepper
Prep first: chop the pumpkin and onion. Preheat oven to 180C.
Place the onion in a frying pan with 2 tbsp oil and some salt. Saute over high heat for 10 minutes, stirring frequently, until golden brown. Set aside.
Pour hot water from the tap over the apricots, just enough to cover them. Soak for 5 minutes then drain and cut into 5mm dice.
Mixed the diced pumpkin with 1 tbsp oil and some salt and pepper. Spread on a baking tray and place in oven. Bake for about 25 minutes, until quite soft.
While pumpkin is baking, cook the quinoa. Bring the stock to the boil with saffron. Place the quinoa in a large pot and pour the boiling stock over it. Cover the pot and leave for 10 minutes.
Hopefully, the quinoa will have absorbed all the moisture and gone slightly translucent, so you can see the germ in each grain. If not, then put the pot on a low heat and steam off the excess moisture, stirring regularly so it doesn't stick to the bottom.
Add a little oil and use a fork or whisk to fluff up the quinoa. Then add the onion, pumpkin, apricots, herbs, cinnamon and lemon zest. Mix well, season as necessary, and serve warmish or cold.
If you're making it the night before, as I did, leave the herbs for the next day - chop and stir through just before serving.
Adapted from 'Ottolenghi: The Cookbook' by Yotam Ottolenghi and Sami Tamimi
Labels:
gluten-free,
pumpkin,
quinoa,
salad,
sydney international food festival,
vegan
Thursday, October 28, 2010
Siff Week #3 - Just Desserts, and Gluten-free Choc Chip Cookie Bars
Last Tuesday I went to the Tomislav-Black Star Pastry SIFF 'special dinner' night, titled Just Desserts. Despite the name, I didn't actually believe it was going to be mostly desserts until we arrived and saw the menu. Yeah, I know.
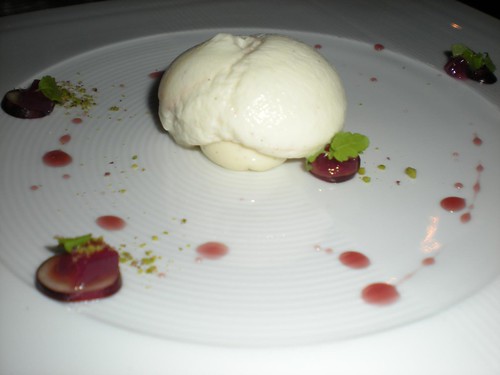
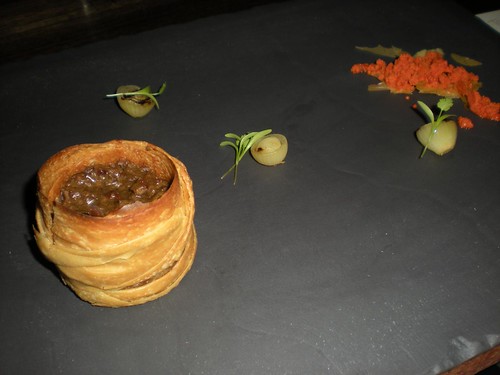
According to staff, the two chefs Tomislav Martinovic and Chris The teamed up on every dish. Each contributed elements to each course - so for instance The (a pastry chef) did the pastry on the meat pie, while Tomislav (leaning more towards the molecular gastronomy angle) did the granita-esque version of tomato sauce on the side. Between them, it was a very pretty meal, and although the dishes were dessert, they never veered towards the overly sweet. Instead a mix of sour, salty, tart, crunchy or hot kept the entire meal in balance.
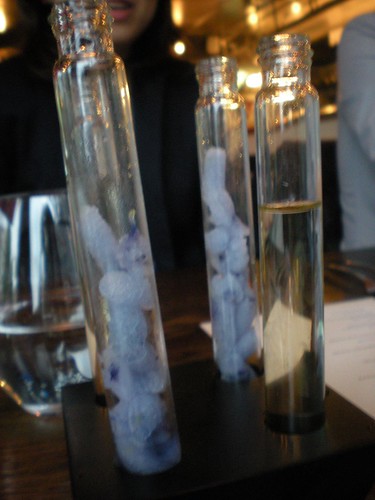
Amuse bouche consisted of a test tube of Delamotte champagne and another of violet granita. Pour one tube into the other, swirl and drink - mmm, flowery.
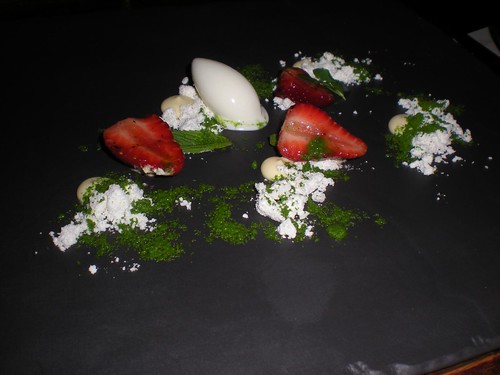
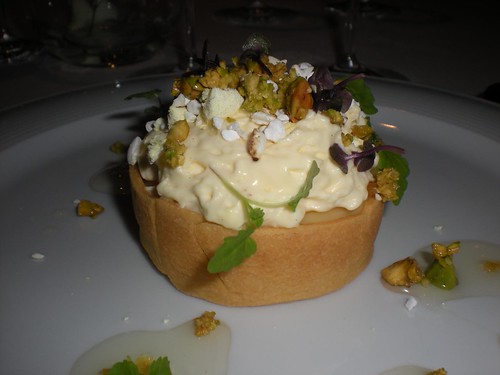
First course: Grilled strawberries, mint and white chocolate. With 2008 Bress 'The Kindest Cut' Gewurztraminer, Victoria. This looked stunning, red and green and white against a slab of black tile, but was probably the least substantial of the courses.
Goats curd cheesecake with elderflower and pistachio. With 2008 Alacia Moscato D'Asti, Piedmont Italy. My favourite dish of the night - loved the sourness of the cheesecake with the sweetness of the elderberry.
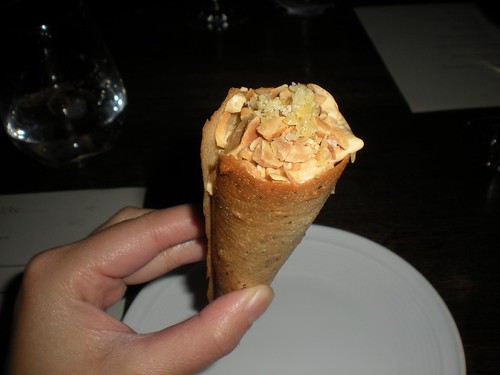
Caramel icecream and toasted peanuts - served in a cone, the topping snapped and crackled in your mouth like those kid's candies! With 2007 Juniper Cane-cut Riesling, Western Australia.
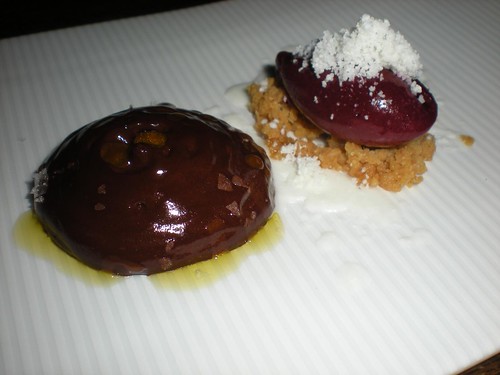
Warm chocolate mousse, olive oil and sea salt, flavoured with horseradish; opinions differed, but I thought all the flavours worked. With 2008 Alan & Veitch Merlot, South Australia.
Beef mince pie, grilled onions and (frozen, granita-like) tomato sauce. With Karlovacko beer, Croatia.
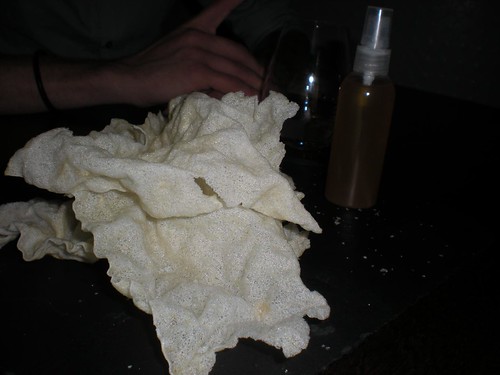
Rice crackers with sea salt and vinegar - the vinegar came in a little bottle for us to spray it on the chips ourselves. One of Tomislav's signature dishes.
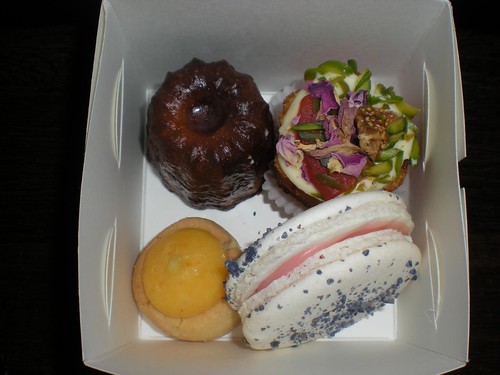
Take-away box from Black Star Pastry - very cute. Though I do think the rose-flavoured macaron was far too sweet, and the canelle a little burnt; my favourite by far was the fig and orange cake (top right corner).
Despite vowing not to bake this month (due to the amount of sweets I've been consuming), I decided to make an end to the last of the gluten-free flour sitting in my cupboard by making the following cookie bars. The result was far from perfect, as I'll explain below, but when I took these to work they were swiftly devoured!
Choc Chip Cookie Bars
Preheat oven to 175C (350 F). Lightly oil or line with parchment a brownie baking pan.
In a mixing bowl, beat together:
3 large free-range organic eggs
1/2 cup vegetable oil or saffoil
2 teaspoons vanilla essence
Add in and beat:
1 cup firmly packed organic light brown sugar - which I reduced to about 2/3 of a cup
Add in and beat, or mix in a separate bowl and then make a well and beat in the wet ingredients:
2 cups gluten free baking flour - I used White Wings
1/2 teaspoon baking powder
Stir in:
3/4 cup sweetened flaked coconut
1 cup dark chocolate chips
Using a rubber or silicone spatula, spread the dough evenly in the baking pan. The mixture is VERY sticky and heavy, so the spatula works much better than a wooden spoon. If you like, add some extra chips to the top and lightly press into the batter.
Bake on a center rack until the bars are set, about 21 to 25 minutes, depending upon your oven. Despite what the original recipe says, they will NOT turn golden, they'll be a warm yellow at best.
Do not over-bake - you want them a bit chewy - this is where I overshot because I was aiming for colour instead of consistency! Sadly, mine wound up too dry. Sigh.
Allow the bars to cool on a wire rack before cutting.
Makes 15 to 18 squares; I made well over 20.
Adapted from Gluten Free Goddess
Labels:
baking,
cookies,
gluten-free,
slice,
sydney international food festival
Sunday, October 17, 2010
Siff Week #2
Picking up from the last post, I returned to Single Origin to sample the next in their Origin Breakfast series. This time we had coffee and food from Nicaragua. The coffee - again, prepared 3 ways by siphon, cold drip and espresso - was more aromatic and flavourful than last week's Yemenese blend, and the different preparations really brought out different flavours. In a word, yum.
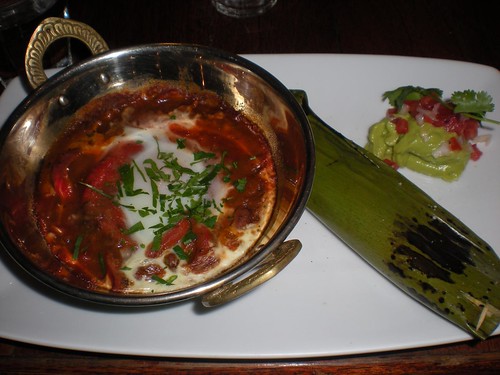
Also yum - beans and tamale, the latter wrapped in a banana leaf, with a side of avocado salsa.
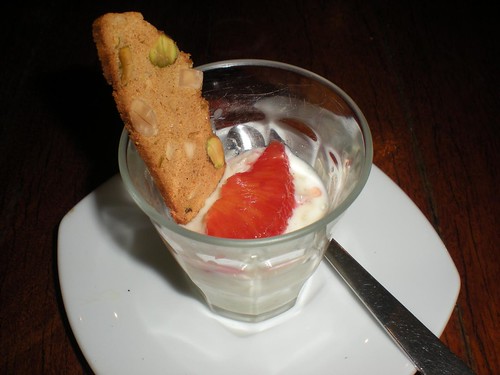
To finish we were served little glasses of rice pudding with blood orange and biscotti. This was delicious and gone all too soon - we eyed with envy a neighbouring table which seemed to have much larger servings than we did. Hmmm.
Then on the weekend things got ridiculous - I went to not one but TWO high teas, starting with the Marie Antoinette-themed tea at the Westin Hotel, Martin Place. The lobby cafe at the hotel is so lovely, all light and glass and sandstone, and it feels very much exactly the right place for something as finicky and pretty and indulgent as high tea.
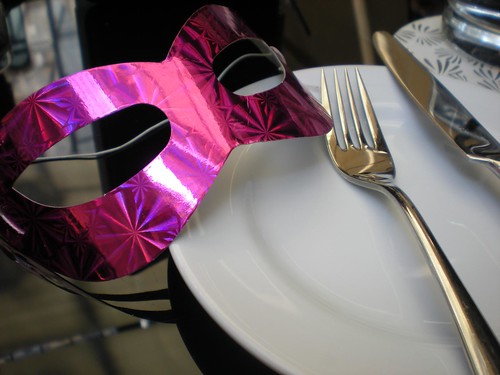
The Marie Antoinette theme is mostly just a gimmick, but to get in the spirit of things the Westin adds a domino to every place setting, and there's a pretty carved fan for each table to play with as well. Though staff encourage you to take the masks home, the fans are (sadly) Westin property.
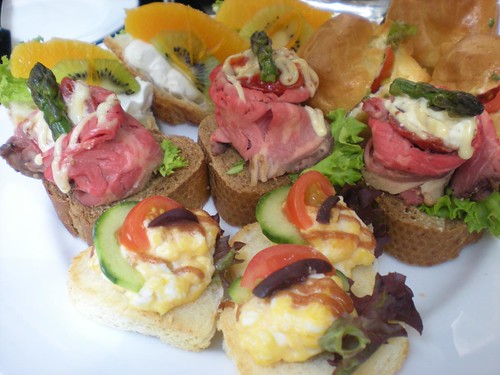
The savoury plate is included in the menu under the rather grandiose title There is nothing new except what has been forgotten. Okay. The plate included slow cooked roast beef with crème cheese stuffed baby belle peppers; avocado and shrimp tartar inside choux pastry; blt and deviled egg finger sandwiches; and kiwi and orange croissant with mascarpone. We agreed this plate was generally stronger than the sweets, though less delightful to the eye.
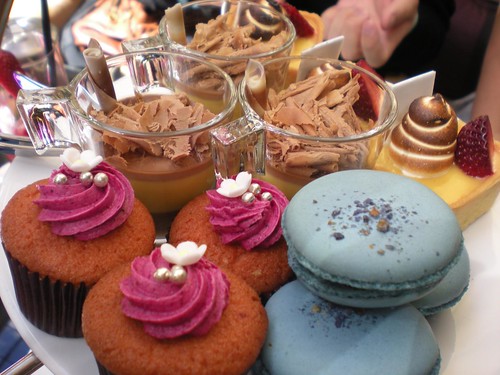
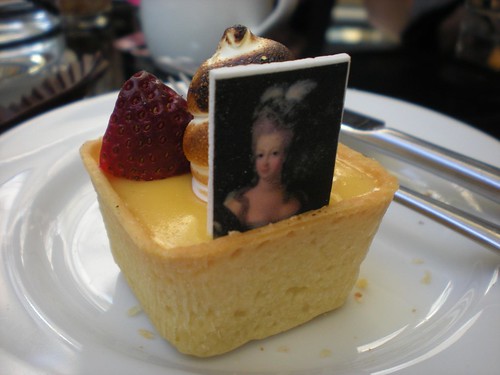
The sweets (titled, as you'd expect, Let them eat cake!) included lime curd meringue tart, topped with a portrait of the queen; chocolate cream with exotic fruit caramel and candied walnuts; macaroons with fresh blueberries; and beetroot and cherry cup cakes. The chocolate cream was by far my least favourite dish, and I couldn't taste the beetroot in the cupcakes (though others claimed they could), but the whole thing looked fantastic which almost made up for it. Yes, I'm easily won.
Here's a close-up of the queen. Not pictured, but included of course, were unlimited tea and coffee, and scones with jam and cream, all of which were of a very acceptably delicious standard.
The second high tea, at the Museum of Sydney Cafe, was a much less fanciful affair. Despite the muddles I had with the booking beforehand (our reservation was at various times taken, not taken, re-taken, on the wrong day, etc) once we arrived both the tea and coffee were served briskly, and the food almost at once.
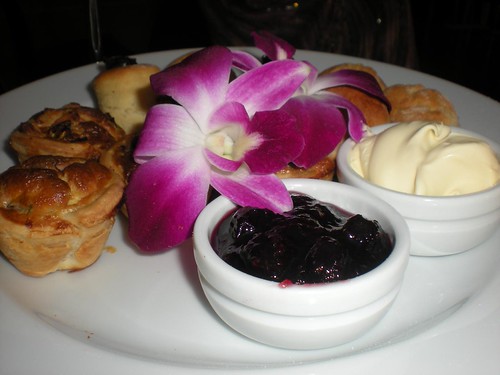
Here's the scones with jam and cream, and two types of mini quiche - mushroom, and lorraine - topped with a pretty flower. (Not pictured are the finger sandwiches, filled with variously cucumber, salmon, chicken, and curried egg.)
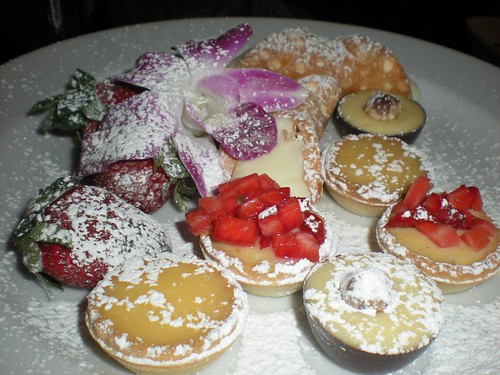
Here's the sweets, which were quite nice if not outstanding - though as you can see there was rather a heavy hand with the icing sugar in the kitchen. Topped, again, by a pretty flower, if only you could make it out from underneath all that snow.
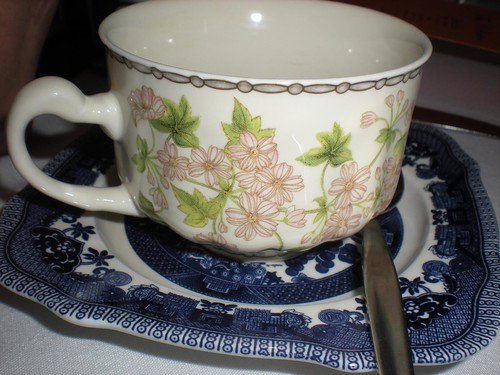
The tea arrived in plain white pots but was served in prettily mismatched cups and saucers, like so. The whole thing had a bit of a charmingly home-style feel, though for food alone I would have to rate the Westin higher.
So there's week 2! And now for more salad.
Sunday, October 10, 2010
SIFF Week #1
The first week of the Sydney International Food Festival (or Crave, or whatever they're calling it this year) is over and SO MUCH eating has already occurred!
In lieu of any recipes (as if I've had time much less appetite to bake) here's a brief photographic overview:
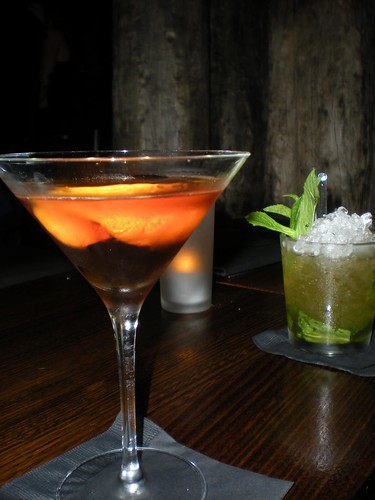
Cocktails at Monkey Magic, Surry Hills, for Cocktail of the Month. The drink in the photo is actually a Deus Ex Nectar - orange blossom belvedere and Pedro Ximenez sherry - so, not actually the cocktail of the month. I give my promise as an eyewitness that the SIFF deal was excellent value, for whatever that's worth!
Lemon meringue tart at Becasse, to go with the Let's Do Lunch deal of risotto of South Australian prawns and proscuitto, served with Brown Brothers wine. The risotto was very nice, as were the amuse bouche of black olive biscotti and the restaurant's signature fresh bread. The best part of the meal, perhaps, were the envious glances cast towards our table when we received our beautiful little pre-desserts: kiwi fruit granita with tiny meringues, orange jelly and champagne mousse. I drink your envious glances! I drink them all up! :9
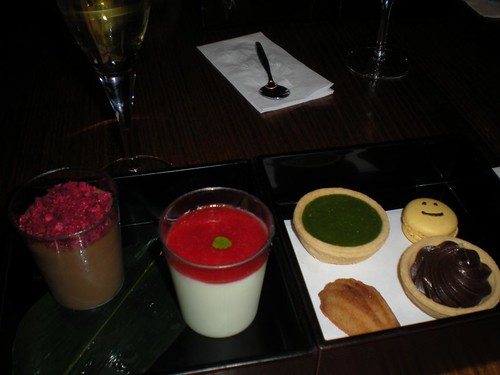
Azuma Kushiyaki's double bento box of desserty Sugar Hit goodness. This included a chocolate mousse with berries, pannacotta, matcha green tea tart, wasabi ganache tart, madeleine, orange macaron (with smiley face) and a glass of Brown Brothers' dessert wine - all for $20! There were certain elements that didn't quite work (the berries on the mousse, the pastry on the tarts) and opinions amongst our group were quite divided over the matcha and wasabi tarts but for the most part this is by far the best value and cutest Sugar Hit I've ever seen.
Finally, I got up at an INSANE (for me) hour to make our 7.30 am booking at Single Origin's Origin Breakfast of coffee, served 3 ways, and Yemen-themed food.
First up was siphon coffee. The barista made the coffee for us right at the table - not without some difficulty, as the morning breeze played havoc with the open gas flame - which I thought was extremely impressive! (Though, when I have tried to describe it to other people since then, they don't seem particularly impressed. "So, it was basically like that stovetop camping coffee, but in a fancy glass flask?" "... well. Basically.")
The savoury course consisted of saltah (a spiced egg and rice dish) and flatbread. Very tasty.
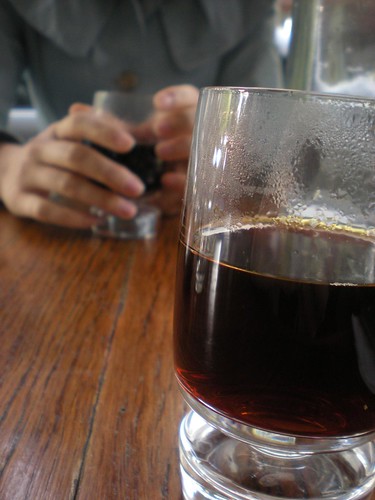
Cold-drip coffee, which we were told took all night to prepare with 'one drip every other second'. No heat is applied to the beans at all. The barista compared the end result to cognac!
The third and final coffee was the classic espresso - YUM. Mine was a skim flat white.
And last of all a dessert we were told had been prepared by the chef and his girlfriend - adorable! We weren't actually told what it was, so all I can tell you is that a) the cake was caramelly and layered, and b) those are preserved prunes on the side, and c) it was SO GOOOOD.
So there's week one. Now I need a salad.
Monday, September 27, 2010
Lemon cloud tea cookies
With October and the Sydney Food Festival just days away, we're on the cusp of a whole month of eating. But for early starters, there were at least two festivals this weekend to eat one's way through:
First up was Oktoberfest. Due to trackwork, the usual 10 minute train ride from Central turned into a 70 minute (!) two-bus commute to Tempe and the Concordia German Club. The beautiful weather and the historical re-enactments, complete with musketfire, almost made up for it.
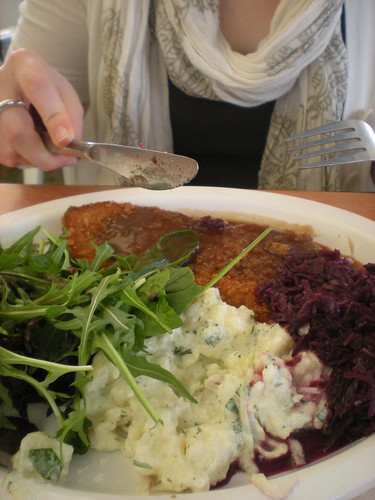
And of course there was the obligatory schnitzel, sauerkraut, strudel, and schnapps. If you've never been to the Concordia club, I do recommend it. As their souvenir steiner suggests, it's where beer and kangaroos meet.
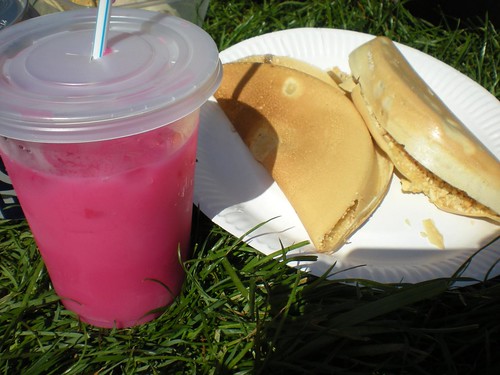
On Sunday it was time for the Malaysia Festival in Tumbalong Park at Darling Harbour. Lots of colourful costumes and performances, and some equally colourful food. (Full disclosure: this pink rose-flavoured drink was horrid, but it LOOKED great. Like something Hello Kitty would drink!)
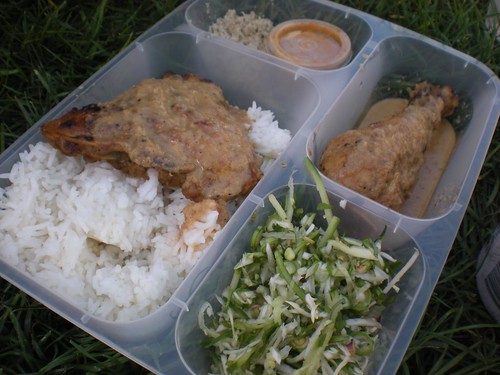
For the less sweet-toothed, there was also plenty of curry, laksa, roti and rojak; and at least five different stalls selling their own versions of nasi lemak. Om nom!
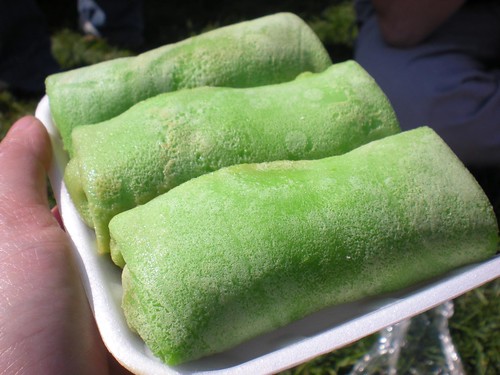
My favourite, however, was both brightly coloured and sweet - dadar pandan, or pandan crepes filled with coconut and palm sugar, mmm...
Okay so the recipe below has nothing to do with this weekend of festival eating, except timing. Note I went back to my old fave, Technicolor Kitchen, for the recipe - I make no apologies.
This was a quick, easy recipe. I followed the instructions faithfully but overall I thought it could've been a bit more punchy in flavour, a little richer. As is they are a light biscuit best had with tea or coffee.
Lemon cloud tea cookies
1 1/2 cups (210g) all purpose flour
3/4 cup cornstarch
4 teaspoons baking powder
1/8 teaspoon salt
113g (8 tablespoons/1 stick) unsalted butter, softened
1 cup (140g) confectioners’ sugar
2 large eggs
1 teaspoon vanilla
1 teaspoon lemon juice
1 teaspoon finely grated lemon zest
Preheat oven to 160°C (325°F) and line two large baking sheets with baking paper.
Sift the flour, cornstarch, baking powder and salt in a bowl. Set aside.
Combine the butter and confectioners' sugar until light.
Beat in the eggs one at a time. Batter may look broken and curdled. Beat in the juice and zest. Beat in the flour mixture.
Arrange rounded teaspoons of the dough on prepared pans. Space the balls about 5cm apart. Flour a fork and press a crisscross design into the top of each mound of dough.
Bake the cookies until they spread and become golden, about 20 minutes. Slide the parchment paper off the pan to cool completely.
Makes 48 tiny cookies - I made over 50.
From Technicolor Kitchen
Sunday, September 19, 2010
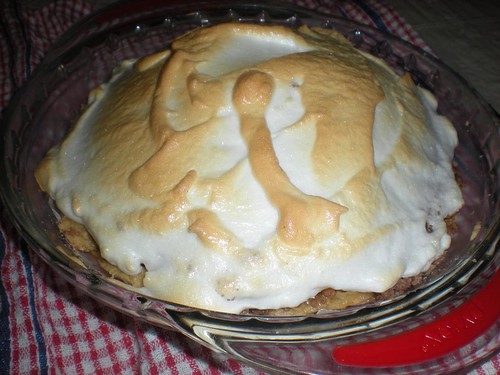
Peanut Butter Cream Pie
"I can actually feel my heart beating faster from all the sugar in this," I confessed as I finished my first slice. So, fair warning, this one is even less healthy than the things which usually appear on this blog!
I made this pie at the suggestion of Michelle, a fellow peanut butter fiend, who saw a similar pie on Man v. Food. After looking at a few different variations, I cobbled the recipe below from a couple of different blogs. It seemed like such a simple recipe, albeit with a lot of different elements...
Little did I know that just about everything that could go pear-shaped in the process did. For instance -
a) I didn't make enough crust for my plate, so had to quickly make some more dough and paste it around the edges. Elegant.
b) Some of my custard burnt and had to be discarded.
c) And I still had twice as much as I needed anyway.
d) The meringue turned out beautiful! But then I put foil over the top and, uh, it wasn't so pretty after that.
e) Apparently you should eat these as soon as you make them. Instead of, say, storing it overnight in the fridge so that the sugar dissolves and becomes a gooey syrupy mess.
For all that, it wasn't a total failure! The layering in particular did turn out kinda nice-looking, and the taste was very rich and nutty. Now that I know where I went wrong, I am optimistic that I can conquer the problems on the second attempt. Provided my heart holds out long enough for me to give it another go, of course.
Peanut Butter Cream Pie
Crust
The Homesick Texan says this is enough to make 2 crusts, so I halved the recipe... and didn't have enough to cover my 24cm pie plate. So I'd suggest, um, making this at 3/4 of the ratio below?
2 cups of flour
1 tsp salt
1/2 cup oil (corn, canola or vegetable)
1/4 cup milk
Mix flour and salt. Mix oil and milk. Pour oil and milk into flour and salt and stir until combined into a dough. If it's too dry, add more milk.
Depending on how much you made, you can reserve some for later or use the whole.
Use a rolling pin to roll out between two sheets of wax paper, then line a buttered pie pan with the rolled-out crust.
Bake at 180C (350F) until lightly golden. Mine took about 20 minutes.
Crumb Mixture
1 cup powdered sugar
1/2 cup crunchy peanut butter
2 tsp cocoa powder
Mix powdered sugar, cocoa, and peanut butter until small crumbs form. Linnea's Blog suggests using a mixer; I found a fork was more than sufficient. For the peanut butter, I used Kraft.
Pudding (custard)
Using Linnea's Blog proportions, I made twice as much pudding as I needed - so I'd suggest halving the amounts below.
1 cup cold milk
1 cup cornstarch
1 tsp salt
1 tsp vanilla
3 egg yolks
3 cups milk
3 tsp butter
3/4 cup sugar
Mix corn starch, salt, 1 cup milk, egg yolks and vanilla with a wire whisk and set aside.
Heat 3 cups milk, butter and sugar until scalding, stirring constantly.
Add cornstarch mixture to hot milk while stirring with whisk. Cook until thickened. Remove from heat before it boils.
Place pudding in refridgerator to chill. Stir every 10 minutes.
Meringue
2 egg whites
1/8 teaspoon of salt
4 tablespoons of sugar
Beat your egg whites with salt and when they start to get fluffy add the sugar.
Assembly
Layer as follows: Start with half the crumbs in the pie shell. Then spoon the pudding on top of the crumbs. Place the remaining crumbs on top of pudding.
Finally layer the meringue on top. Bake pie until peaks on the meringue are lightly browned, about 10 minutes at 180C (350F).
Serve immediately.
Adapted from Linnea's Blog and Homesick Texan
Sunday, August 29, 2010
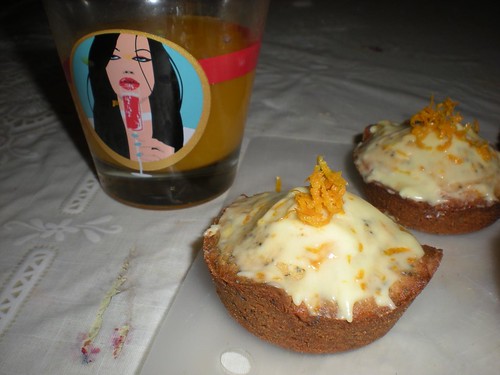
Honey poppy seed cakes with orange icing
Seems like all I've been doing this past weekend has been eating and shopping - wait, that sounds like every weekend. Some new places I tried on Saturday:
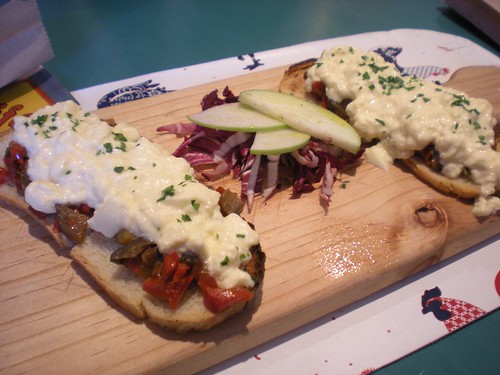
First I had a delicious brunch at Bruschetteria 102 at 102 Albion St, Surry Hills. Their Nutella coffee is divine and the atmosphere was really chilled and friendly; everything was cute as a button down to the individualised coffee cups and colourful placemats.
Then it was off to the Saturday markets in Glebe. But first, a stop at La Banette Patisserie (18 Glebe Point Road). Everything in their windows looked so pretty - tarts, millefeuilles, sourdough, eclairs, meringues, oh, there was so much of everything. No photos of their wares, sadly.
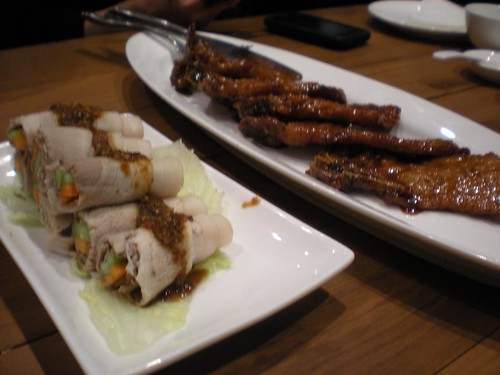
For dinner I went to Chef's Gallery (Regent Place, Bathurst St, Sydney). It's the latest Taiwanese-style dumpling and noodle house, quite similar to Din Tai Fung with the same open windows into the kitchen (hence the name) and quick, efficient service. At the moment it's very busy, there's always a queue to get in and many of the signature dishes seem to sell out early - but even so, it's worth a visit. I've already been twice in the past week!
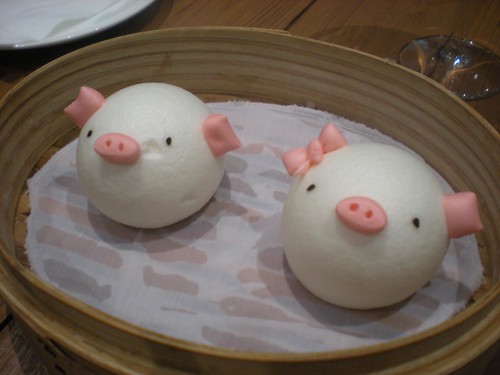
While the handmade noodles are fine, and fun to watch being prepared in the front window, I'd recommend sticking to the array of dumplings, pork belly rolls, barbecue pork ribs, tofu, and pancakes with pork floss. And definitely leave room for the adorable desserts.
Finally this evening I came home and cooked a meal for the first time in days - Thai egg nets, mmm. And then my housemates roasted two whole fish with vegetables. And then we shared it all over wine. And then for dessert we had muffins. And then I was very very full. THE END.
Honey poppy seed cakes with orange icing
Cakes:
184g unsalted butter, softened
146g caster sugar
3 tablespoons honey
2 eggs
225g all purpose flour, sifted
1 teaspoon baking powder
pinch of salt
3 tablespoons poppy seeds
Icing:
210g icing sugar, sifted (uh, I used something closer to 80g, and it was just enough; about 100g should do it)
zest of 1 orange
1-2 tablespoons freshly squeezed orange juice
Preheat the oven to 180°C/350°F and butter twelve cup capacity muffin pan.
Place butter, sugar and honey in the bowl of an electric mixer and beat until light and creamy. Add the eggs, one at a time, and beat well. Fold through the flour, baking powder, salt and poppy seeds.
Spoon the mixture into prepared pans. Bake for 15-20 minutes or until golden and cooked when tested with a skewer. Cool in pans on a wire rack then carefully unmold.
Make the icing: place the icing sugar in a medium bowl and mix in the zest. Gradually add the juice, mixing, until desired consistency. Drizzle the icing over the cooled cakes.
Makes 12 cakes.
From Technicolor Kitchen - whose recipes, I realise, I've been cribbing from a LOT lately. I really do read a lot more blogs than just TK, I promise! /o\ Okay, next time I will definitely look further afield.
Saturday, August 14, 2010
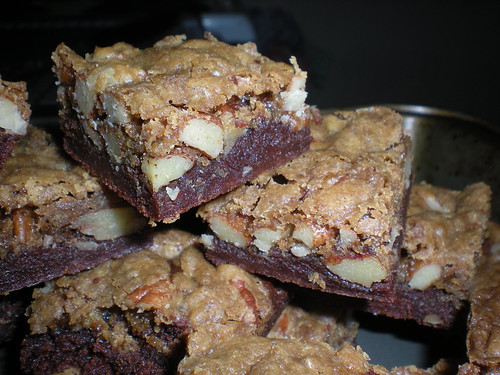
Black bottom pecan praline bars
If a pecan pie and a brownie had a baby - actually, let's not go there. This brownie variation is ugly but sweet and very easy to make.
When I was just starting to bake, a few years ago, the hard part was having the right equipment. Right now, I'm in a good spot because I've managed to accumulate most of the things I need, and to have access to my housemate's stuff too.
If I had to start over, or if anyone asked me how to begin (lol not likely), then these would be the top of the list:
A silicone spatula. SO much better than a wooden spoon.
Kitchen scales. Cups are nice but scales take all the uncertainty out of measurement.
At least one large glass bowl and at least one large stainless steel bowl.
And an apron. Because they are cute.
Black bottom pecan praline bars
Brownie layer
56g (2oz) unsweetened chocolate – I used 70% Black & Green
4 tablespoons (56g) unsalted butter
½ cup + 1 tablespoon (112g) caster sugar
1/2 teaspoon vanilla extract
1/8 teaspoon salt
1 cold large egg
1/4 cup (35g) all purpose flour
Preheat the oven to 180°C/350°F. Butter a 22cm (9in) square pan (I just used my standard brownie tin) and line the bottom and sides with foil, leaving an overhang on two opposite sides. Butter foil as well.
Start with the brownie layer: place the chocolate and butter in a medium heatproof bowl set over a saucepan of barely simmering water. Stir frequently until the chocolate is melted and the mixture is smooth.
Remove the bowl from the heat. Stir in the sugar, vanilla, and salt with a wooden spoon or silicone spatula.
Add the egg. Stir in the flour and beat with a wooden spoon until the batter is smooth, glossy, and beginning to come away from the sides of the bowl, 1-2 minutes.
Spread the brownie batter in a thin even layer in the bottom of the lined pan. Set aside.
Praline layer
1/4 cup (35g) all-purpose flour
1/4 teaspoon baking soda
4 tablespoons (56g) unsalted butter, melted
1/4 cup + 2 tablespoons (70g) packed brown sugar
1/4 teaspoon salt
1 large egg yolk
1/2 teaspoon vanilla extract
1 1/4 cups (140g) pecans, coarsely chopped
For the praline layer, mix the flour and baking soda together thoroughly and set aside.
Combine the melted butter, sugar, and salt in a medium bowl.
Stir in the egg yolk and vanilla, then the flour mixture, and finally the nuts.
Drop spoonfuls all over the top of the brownie batter - they will spread and cover the brownies entirely during baking. (Although, I actually had enough to spread quite evenly over the whole tray.)
Bake until the edges of the topping are well browned and cracked, 20 to 25 minutes. Let cool completely in pan on a rack.
Lift up the ends of the parchment or foil liner, and transfer the brownies to a cutting board. Cut into 25 bars.
From Technicolor Kitchen
Monday, July 26, 2010
Poh's Orange Chiffon Cake
Last night, like so many thousands of people around the nation, a group of us gathered to warm our hands at the digital fireplace and share a moment in history. In short, MASTERCHEF FINALE ZOMG YAY FOR ADAM.
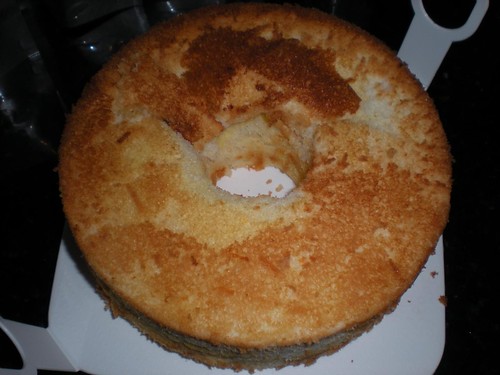
To mark the occasion, I made an orange chiffon cake from a recipe by last year's runner-up and my current favourite tv cook, Poh Ling Yeow. While in her version she finishes it with cream and whatnot, I kept it simple - chiffon cakes are really just perfect on their own.
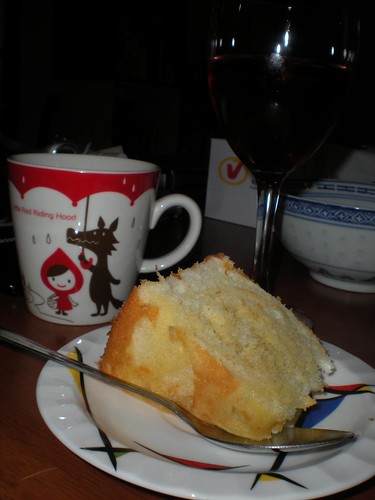
For more chiffon cake goodness, try Azuma Patisserie in Sydney CBD which has a constant array of the most gorgeous, pillowy cakes in flavours including earl grey, green tea, and chocolate. Their cakes are of a massive height too, at least twice as tall as the one I achieved!
Orange Chiffon Cake
Poh's recipe very specifically states that you need to use a NON non-stick tin, so that when you invert the cake after baking the cake will hold its shape until it's cool. I found it impossible to locate a sticky tin easily, so I just went ahead and used a non-stick tin anyway, and guess what, it stuck perfectly! In fact it stuck so well that I lost some of the top when I was decanting it. Oops.
5 egg whites (at room temperature is best)
1/2 tsp cream of tartar
75g caster sugar
5 egg yolks
7 tbs coconut milk
5 tbs vegetable oil
75g caster sugar
5 tbs orange juice
1 tbs orange zest
150g self raising flour, sifted
Preheat oven at 160°C fan forced/180°C regular.
Beat egg whites and cream of tartar with an electric mixer till soft peaks. Add sugar one tablespoon at a time a beat thoroughly after each addition till you achieve stiff peaks. Set aside.
In a separate bowl whisk egg yolks with caster sugar till fluffy. Add coconut milk, vegetable oil, orange juice, zest and self raising flour and whisk until combined. Gently fold the egg whites together with the yolk mixture in three batches.
Pour into a 22cm baba cake tin or angel cake tin. I used an angel cake tin with a removable base. Do not grease the tin.
Bake 25 mins at 160°C fan forced or 30 mins at 180°C, or till skewer comes out clean. Leave oven on to roast hazelnuts.
When the cake is out of the oven, immediately invert the cake still in the tin. Place on a cooling rack and leave to cool completely (about 2 hours).
From Poh's Kitchen
Monday, July 19, 2010
Chocolate Meringues
Despite the Zuger Kirschtorte, I STILL had some egg whites to dispose of - hence, meringues. With only three ingredients, this was the quickest and easiest way to get rid of the remaining whites.
This recipe uses the 'Swiss method' and is taken from the Bourke Street Bakery cookbook.
Chocolate meringues
The proportion is 1 part eggs to 2 parts sugar. I actually used 170g egg white to a whopping 340g sugar, but the purposes of this recipe I've kept BSB's measurements.
105g egg whites (about 3)
210g caster sugar
70g unsweetened cocoa powder, sifted into a bowl
Preheat oven to 130C.
Stir egg white and sugar in a very clean stainless steel bowl. Place the bowl over a saucepan of boiling water and stir continually, scraping down the sides with a rubber spatula.
When the liquid is smooth and clear, remove from heat. Wipe the bottom of the bowl to prevent water from contacting the mix.
Whisk the warm liquid in a stand mixer or with a hand mixer until it's cool and firm peaks form. This will take about 10 minutes. My mix looked very white and very sticky.
Using a large spoon, scoop up a meringue and drop it into the cocoa powder. BSB suggests swirling the bowl so it's completely coated. This sounds so easy! Needless to say I made a mess.
Place meringues on a tray lined with baking paper. Using the tips of your fingers, 'drag' the meringue upwards a little to streak the chocolate and create a peak. Or try, anyway.
Turn the oven to 100C and bake meringues for approximately 90 minutes or until they're crisp outside and soft in the centre. (BSB suggests if you want them crispy all the way through, you can bake them for up to 6 hours!)
BSB's proportions make 12-18 small meringues or 4-6 large ones. Starting with more mixture, I made 20 medium sized ones, just to be different.
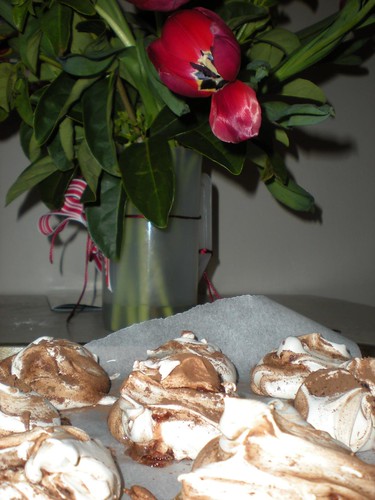
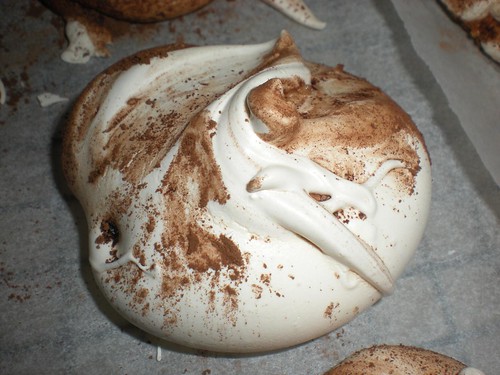
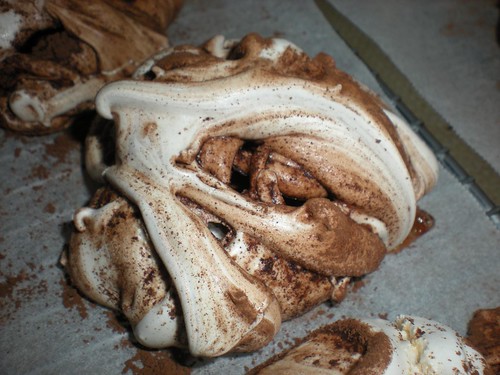
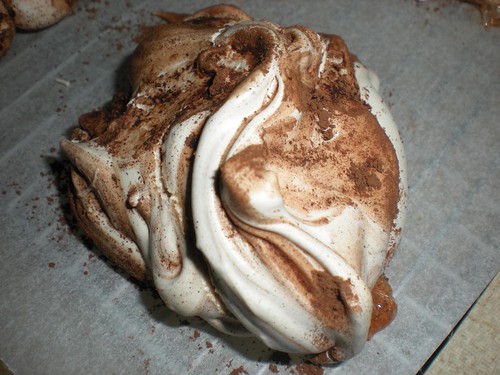
Uniformity not being one of my strong points, my meringues all turned out so different-looking!
This one reminded me of a poached egg:
This one was a bit like larvae from Alien:
And I don't know, some kind of cloud formation? Or something.
Adapted from 'Bourke Street Bakery' by Paul Allam and David McGuinness
Sunday, July 18, 2010
Zuger Kirschtorte
After last week's Crack Pie extravanganza, I found myself with eight egg whites to dispose of. What to do, what to do? Pavlova, meringues, macarons?
A Swiss friend from work suggested this classic Swiss torte - it's basically a genoise sponge, sandwiched between two meringues and flavoured with kirsch (cherry liqueur).
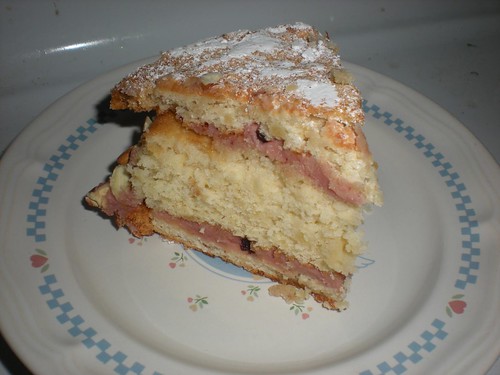
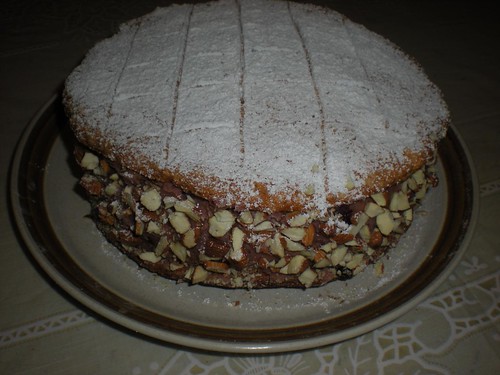
I've known for a long time that presentation is my weak flank but it's particularly obvious when the original looks as gorgeous as it does. I tried! I really tried! But it wasn't to be. I NEED TO WORK ON THIS.
Otherwise, I think it was a success. It's a reasonably light cake, with just enough sweetness in the cream and flavour from the kirsch. The texture of the meringues was great, quite soft and chewy - it reminded me very much of the base of a particular variety of chocolate cream and sponge cake you can get in Chinatown bakeries. And that was a long sentence leading nowhere in particular.
We ate this while watching Master Chef - Iron Chef Sakai was guest judge! - and drinking tea. Nice.
Zuger Kirschtorte
This cake will require a long run-up time because of the meringues - you need to allow at least 4 hours for them to cool in your oven, and during this time of course you can't really start on the genoise sponge cake. I ended up making this over two days: I baked the meringues and genoise cake on day 1, sealed them in an airtight container overnight, then did the cream, syrup, and assembly on day 2.
ALMOND MERINGUE
4 egg whites
120g confectioners' sugar
20g corn starch
100g almond meal/ground almonds
Preheat the oven to 160ºC/320ºF. Draw two 25cm (10in) circles in a large piece of parchment/baking paper, on a baking sheet. Generously butter the insides of each circle.
Sift the confectioners' sugar in a small bowl, add the corn starch and almond meal; set aside.
Beat the egg whites until stiff; remove the bowl from the mixer and, using a rubber spatula, delicately fold the reserved ingredients into the egg whites.
Spread the mixture inside the circles, leaving 0.5cm of the edges free of meringue – it will spread.
Bake for 40-50 minutes, or until the meringue is golden. Turn off the oven and allow meringue to cool inside, for at least 4 hours (can be made overnight).
GENOISE
3 eggs, egg whites and yolks separated
3 tablespoons hot water
80g confectioners' sugar, sifted
10g caster sugar
50g all purpose flour
50g corn starch
pinch of baking powder
Preheat the oven to 175ºC/350ºF; butter a 25cm (10in) springform round cake pan (I used one with a removable bottom), line the bottom with baking paper and butter the paper as well.
Using a mixer, beat the egg yolks with the water until thick and light. Add the confectioners’ sugar gradually and beat well. Set aside. (I beat the yolks by hand, due to a shortage of bowls/equipment, and saved the stand mixer for the egg whites which are so much harder to beat.)
Beat the egg whites until stiff; add the caster sugar and beat well. Remove the bowl from the mixer and add the yolk cream to the egg whites. Sift the flour, corn starch and baking powder over the mixture and fold in carefully with a rubber spatula.
Pour the batter into the prepared pan and bake for 25-30 minutes or until cooked through – the cake will pull apart from the sides of the pan when baked. Transfer the pan to a wire rack and let cool completely.
BUTTERCREAM
150g unsalted butter, room temperature
150g confectioners' sugar, sifted
1 egg yolk
50g currant jam – I used black cherry jam which gave the cream quite a rich colour
Beat the butter until light and creamy. Add the confectioners’ sugar gradually, beating well. Add the egg yolk and jam, beat well until smooth.
SYRUP
4 tablespoons water
20g caster sugar
120ml kirsch - this can be hard to obtain, you may have to look around at a few liquor stores. It's also VERY strong, so I ended up halving this part of the recipe.
In a small saucepan, combine water and sugar over medium-high heat until it starts boiling. Remove from the heat and set aside to cool. Add the kirsch and mix well. Set aside.
TOPPING
100g almonds, toasted and chopped
70g confectioners' sugar
ASSEMBLY
Very carefully, peel the meringue disks off the baking paper and place one of them on a serving plate. Spread 1/3 of the buttercream over the meringue. Place the cake on top of it and brush it generously with the syrup. (As above - I didn't use all the syrup because kirsch is so strong in taste.)
Carefully spread 1/3 of the buttercream over the cake. Cover with the other meringue disk. (As I found it hard to spread the cream without damaging the cake, I spread the cream on the bottom of the top meringue disk and then put that on top.)
Spread the remaining buttercream on the sides of the cake and "stick" the chopped almonds on the cream. (This is hard! VERY VERY HARD. I have no advice except perhaps don't chop the almonds too finely.)
Using a sieve, sprinkle the top of the cake with the confectioners' sugar. Draw a criss-cross pattern on the sugar using the back of a knife.
Keep it refrigerated, but serve it at room temperature – the cake gets hard in the fridge.
From Technicolor Kitchen
Monday, July 12, 2010
Momofuku Crack Pie
Midway through my first slice, I said, "It's nice, but is it really all it's cracked up to be?" Then, when I realised what I'd actually said, "oh, shi-"
"Are you gonna put that on your blog?" Robert said.
So.
I made this on request for Michelle, who saw the recipe on Almost Bourdain. The 'crack pie' - so-called because it's just as addictive - by NYC's Momofuku Milk Bar is apparently a sensation, and according to their website sells for US $44 per pie or US $5.25 per slice. Which sounds HUGE until you think about it, because that's really just a little more than the price of a nice cake at David Jones Food Hall, isn't it?
It was fun to make, and fun to eat, and even if it wasn't quite crack we still finished it all off in one sitting. But since thinking about the amount of butter that went into it is making me feel a bit ill (it could totally be reduced, I think), I am never going to make it again. <-- I reserve the right to renege this if you want to shell out $44.
Momofuku Milk Bar's Crack Pie
Servings: Makes 2 pies (6 to 8 servings each)
COOKIE FOR CRUST
2/3 cup plus 1 tablespoon (3 ounces) flour
Scant 1/8 teaspoon baking powder
Scant 1/8 teaspoon baking soda
1/4 teaspoon salt
1/2 cup (1 stick = 113 g) softened butter
1/3 cup (2 1/2 ounces) light brown sugar
3 tablespoons (1 1/4 ounces) sugar
1 egg
Scant 1 cup (3 1/2 ounces) rolled oats
Heat the oven to 375 F (190 C) degrees.
In a medium bowl, sift together the flour, baking powder, baking soda and salt.
In the bowl of a stand mixer using the paddle attachment, or in a large bowl using an electric mixer, beat the butter, brown sugar and sugar until light and fluffy.
Whisk the egg into the butter mixture until fully incorporated.
With the mixer running, beat in the flour mixture, a little at a time, until fully combined. Stir in the oats until incorporated.
Spread the mixture onto a baking sheet and bake until golden brown and set, about 20 minutes.
Remove from heat and cool to the touch on a rack. Crumble the cooled cookie to use in the crust.
Though called a cookie, the texture of mine was more like a muffin.
CRUST
Crumbled cookie for crust
1/4 cup (1/2 stick = 56 g) butter
1 1/2 tablespoons (3/4 ounce) brown sugar
1/8 teaspoon salt
Combine the crumbled cookie, butter, brown sugar and salt in a food processor and pulse until evenly combined and blended (a little of the mixture clumped between your fingers should hold together).
Or, if you're like me, combine by hand. Use your fingertips rather than palms to avoid melting the butter too much.
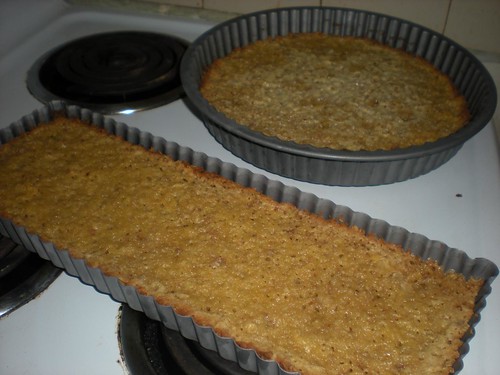
Divide the crust between 2 (10-inch) pie tins. Like Almost Bourdain, I used one round tart pan and one rectangular tart pan.
Press the crust into each shell to form a thin, even layer along the bottom and sides of the tins.
Set the prepared crusts aside while you prepare the filling.
FILLING
1 1/2 cups (10 1/2 ounces) sugar
3/4 cup plus a scant 3 tablespoons (7 ounces) light brown sugar
1/4 teaspoon salt
1/3 cup plus 1 teaspoon (3/4 ounce) milk powder*
1 cup (2 sticks = 226g) butter, melted
3/4 cup plus a scant 2 tablespoons heavy cream
1 teaspoon vanilla extract
8 egg yolks
2 prepared crusts
Powdered sugar, garnish
* Milk powder, you may or may not be surprised to find, is not sold in your local Coles in packets of less than 1kg. Since I didn't anticipate needing to use milk powder again in the near future, I skipped this ingredient. Reasoning that it was included for texture more than flavour, I subbed in a tablespoon of corn starch. Did I do wrong? Is this why I found the pie merely nice, instead of crack-like in addictive quality? You tell me.
Heat the oven to 350 F (176 C).
In a large bowl, whisk together the sugar, brown sugar, salt and milk powder. Whisk in the melted butter, then whisk in the heavy cream and vanilla.
Gently whisk in the egg yolks, being careful not to add too much air.
Divide the filling evenly between the 2 prepared pie shells. My filling had a texture like pureed fruit and was very easy to spread into the shells with a spatula.
Bake the pies, one at a time, for 15 minutes, then reduce the heat to 325 F (162 C) and bake until the filling is slightly jiggly and golden brown (similar to a pecan pie), about 10 minutes.
Remove the pies and cool on a rack.
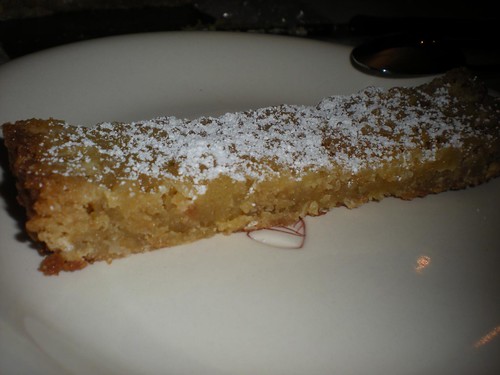
Refrigerate the cooled pies until well chilled. The pies are meant to be served cold, and the filling will be gooey. Dust with powdered sugar before serving.
From Almost Bourdain
Monday, July 5, 2010
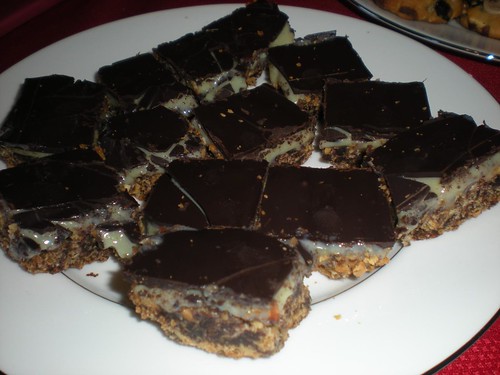
Nanaimo Bars aka Caramel Slice
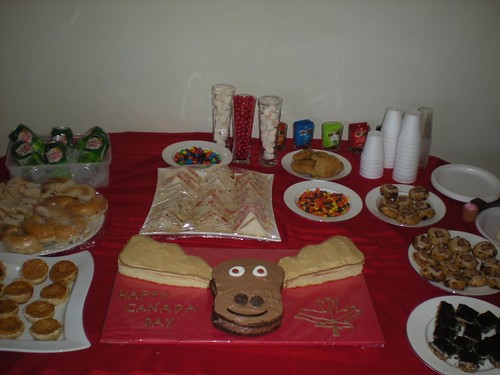
Last Thursday was Canada Day - one of my friends organised a surprise party on the Saturday for her Canadian husband, and we all celebrated by bringing along and then consuming vast quantities of food. There was a moose-mousse cake, maple bacon cookies, Canadian Dry ginger ale, turkey sandwiches, salmon bagels, pumpkin pie, and so much more.
My contribution was the Nanaimo Bar. Allegedly a Canadian specialty, I suspect it is nothing more or less than a good old Ausssie caramel slice!
The traditional recipe calls for Graham Wafers which are not sold in Australia or most places outside North America. The original recipe has instructions on making these from scratch. Being too lazy to do the same, I followed the lead of cooks around the world and used a local substitute, which I crushed to crumbs in a sealed plastic bag with a rolling pin.
Digestive biscuits of any kind are fine; I used Arnotts Granita, which has a marginally lower sugar content and a rougher texture than similar biscuits like the Milk Arrowroot. Some blogs have also suggested it's possible to use half tea sweet biscuit or digestive, and half a salty biscuit or even pretzels - given how strong and sweet the caramel layer is, I think a half salty mix would work really well.
Base:
115gram unsalted butter
50gram granulated sugar
75ml unsweetened cocoa
1 large egg, beaten
200gram Graham Wafer crumbs (see above)
1/2 cup almonds (any type, finely chopped)
1 cup dessicated coconut
Caramel:
2 cans condensed milk (about 800 ml)
30 gram unsalted butter
3 tbsp golden syrup
Topping:
150 gram semi-sweet chocolate (I used 85% Lindt and it was awesome)
2 tablespoons unsalted butter
BASE: Preheat oven to 180 degrees Celsius (160 degrees Celsius fan-forced). Melt unsalted butter, sugar and cocoa in top of a double boiler. Add egg and stir to cook and thicken. Remove from heat. Stir in crumbs, nuts and coconut. Press firmly into an ungreased 8 by 8 inch pan. Bake for 10-12 minutes or until lightly browned and slightly risen. Remove it from oven and let it cool.
CARAMEL: Place butter and golden syrup in a medium saucepan over medium heat, stirring occasionally. When butter has melted, add condensed milk. Stir constantly over medium heat for about 9-12 minutes, until caramel thickens. Gently spread caramel evenly over base. Return to oven for a further 10-12 minutes (a 1/2cm border of lightly browned caramel should form around the edges of the slice).
This was the absolute messiest step by far - condensed milk is NOT a nice texture to work with and the whole kitchen was just sticky and sickly-sweet smelling, ugh. Also, I tried to be smart and used maple syrup instead of golden syrup. This turned out to be a fail because the maple crystallised instead of blending! I had to sieve the hard bits out before I could pour the caramel on to the base, which of course didn't help with the messiness...
TOPPING: Melt chocolate and unsalted butter over low heat. Cool. Once cool, pour over middle layer and chill.
Consider scoring the chocolate when it's semi-solid to enable easier cutting later. I didn't, and mine cracked all over the place!
Use a hot, dry knife to cut the slice - fill a tall glass with hot water, dip knife in water for a few seconds, and wipe dry with a clean tea towel.
From A table for two
Subscribe to:
Posts (Atom)